Solution
What the script does
As part of standard installation, PGT contains a sample Visual Script designed for Juniper EX /QFX switches to collect switch interface information.
The script will issue the following CLI commands and merge their output to compile the resulting CSV file that can be opened in Excel :
- show version
- show interfaces detail
- show chassis hardware
- show configuration interfaces | display set
The resulting CSV file will have the following columns:
- Device IP : the management ip address of the device (the one the script was using)
- Host Name : host name of the device
- FPC : the FPC (Flexible PIC Concentrator) ordinal number
- PIC : the PIC (Physical Interface Card) ordinal number in current FPC
- Port : the hardware port ordinal number in current PIC
- Interface Name : collected or calculated interface name
- Admin Status : Administrative status of the port
- Physical Status : Physical status of the port
- Description : Physical and Logical unit description separated by pipe (|)
- Speed : The configured port speed
- Duplex : The configured duplex mode
- MTU : Currently configured MTU size
- Last flapped date : The date and time the last time the interface flapped
- Stable since : The time elapsed since the last flap
- SFP Type : Type of SFP if applicable
- IntRange : not used currently
- AggregateID : The aggregate interface name this port belongs to
- RangeName : The interface range name the interface is part of
- Port mode : Access or Trunk port mode
- Vlans : The vlans the current port carries
Using a vScript to collect information
There are a few tasks you need to perform to start using the script, but 80% of them is required only the first time:
- Install PGT - obviously, first time only
- Register the script - first time only
- Configure device access - first time only
- Generate an execution script - depends on your needs, the script can be saved to file for reuse
- Execute script - whenever you need
Prerequisite – IronPython installation
If you installed PGT with default installation options, you can safely skip this step.
Because the Visual Script is written in Python, it is a prerequisite to have IronPython installed. PGT installer will automatically install it unless the option was deselected during installation. The latter case, the installer file named IronPython-2.7.8.msi is copied to PGT installation folder, so it can be manually installed later.
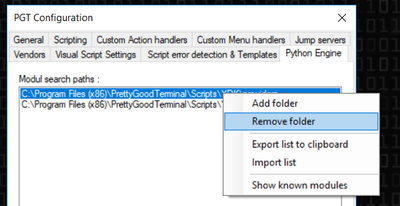
After you installed IronPython, start PGT and go to Tools/Options and select the Python Engine tab. Remove any search path entry present by right clicking it and selecting Remove Folder:
When the last folder was removed, PGT will ask if you want to add the default Python search paths. Click yes to proceed. If IronPython was installed correctly you should see 5 paths listed by default, similar to below screenshot:
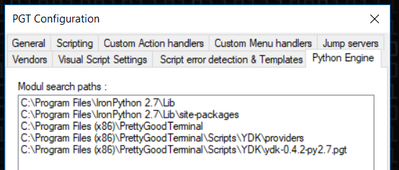
If you see IronPython installation path listed in the path list, PGT is configured correctly to execute Python scripts and Python based Visual Scripts.
Registering the vScript
To use the script, it must first be registered as a Custom Action Handler in PGT. To perform registration, go to Tools/Options select Custom Action Handlers tab and press the yellow add button and browse for the Visual Script file JunOS_InterfaceStatus.vs in the Scripts folder under PGT installation path :
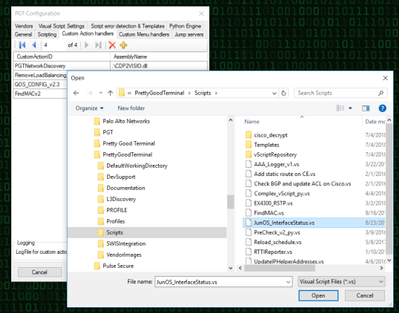
When the script file is selected press Open. Depending on PGT version a “Save As” dialog may be presented, simply press cancel to skip it. When registration is completed, a new entry with CustomActionID name “InterfaceStatus” should appear :
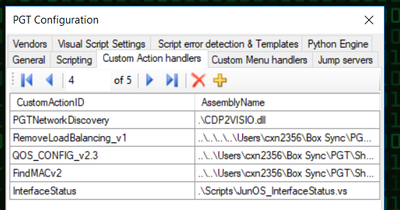
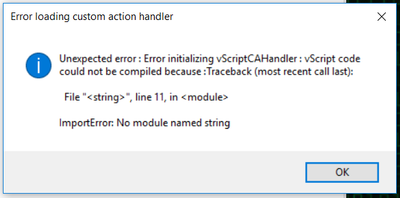
If you receive an error like below, then IronPython was most probably not installed or its installation path is not set correctly in PGT. In this case follow instruction in chapter “Prerequisite – IronPython installation” above.
Running the script
To run the script on selected devices you must first generate an execution script using Script Generator. To launch the Script Generator select it from the Action main menu item, or press Ctrl + G.
If this is the first time you started the Script Generator you will need to set some basic information:
- The jump server to use : leave it empty if no jump server is required
- The default device Vendor : select JunOS
- The default connection protocol : select SSH2_Telnet if you are unsure which one will work
Above information will be remembered for the next time you start the Script Generator.
Additionally, you will need to define the script targets and select the commands to execute:
- In the Device List field enter the management ip addresses of the devices you want to run the script on. Enter one ip address per line.
- Click the Add Command button and from the Custom Action ID drop-down select InterfaceStatus – this actually the script you registered in previous step.
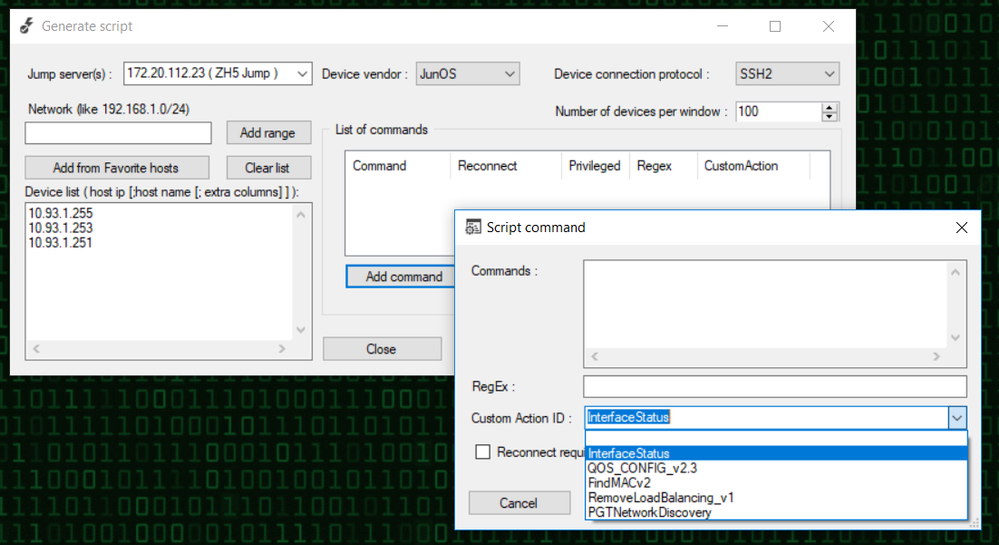
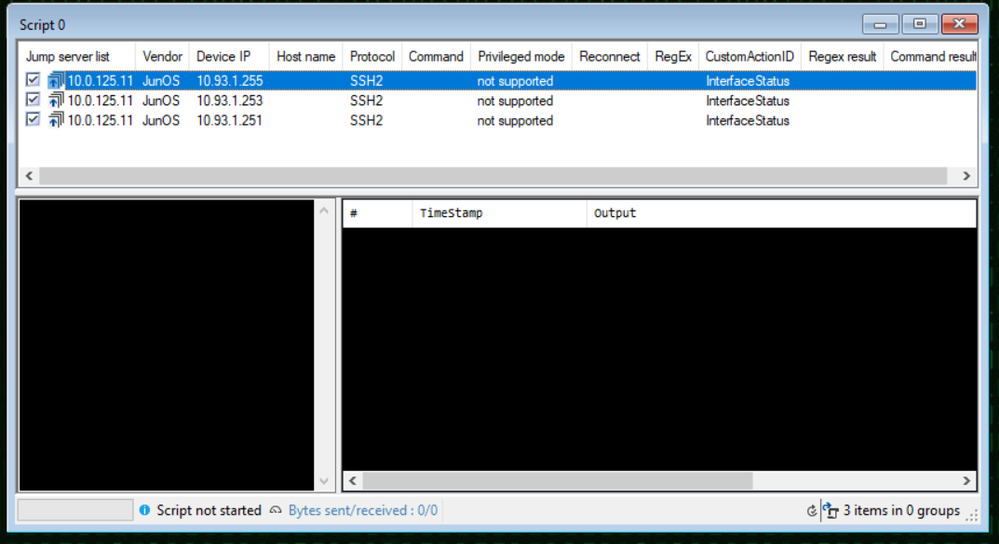
When finished, press the Generate Script button. A new Scripting Form will be shown with similar content as shown below:
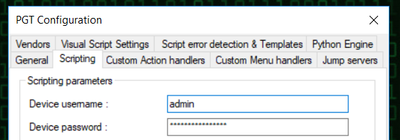
Before you can execute the script, you will also need to define the credentials for device logon. Of course, this needs to be done only the first time you start PGT. To define credentials, go to Tools/Options and select the scripting tab. Here you can specify the default user name and password to be used:
There are several ways to specify logon credentials, if above general setting is not well suited in your case, please consult Users Guide.
If you need to use jump servers, please start watching this tutorial video at 2:48 or read Users Guide.
When finished, you are ready to start the script. Right click any line in the execution script to bring up the context menu and select Execute Now, or press F5:
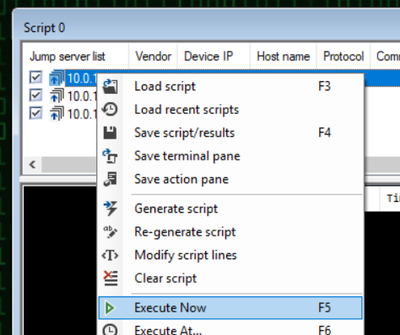
When execution starts a Save As dialog box will open. Here you can specify the file name and location for the result. After the file selected, the script will proceed to each device in the list and execute above mentioned commands. Executing the “show interfaces detail” may take a long time depending on switch physical configuration.
Hopefully no error will occur, then each line the script turns green, and the Command Result column will show “Script v1.2 : Information saved to …”
When the script is finished you will notice a Goodbye message in the Action Pane display at the bottom left corner and you can open the result file. Please note, that the script keeps the file open for about 10 secs after finishing if the application is not closed. During this period, you may only open the file in read-only mode. Either you need to close PGT or wait 10 seconds to have full access to the file.
Productivity tip
When you need to run the script on several switches, depending on switch configurations the script may need a long time to complete due to the amount of data returned for the command show interfaces detail.
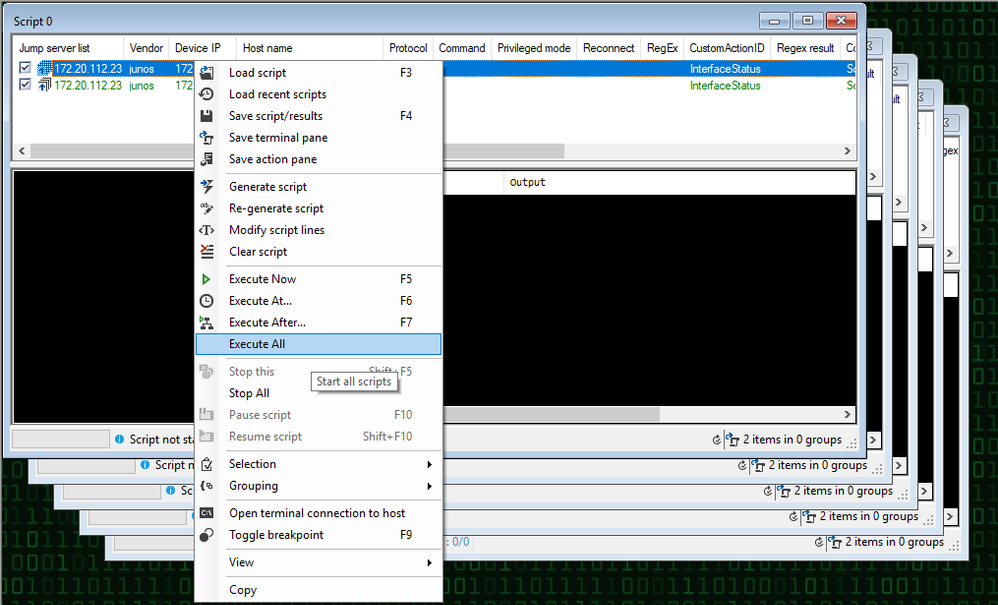
There is a cool scripting feature in PGT that will come in hand in this case : you can generate and run several execution script at the same time, even when you want to save the result to the same file.
You only need to set the number of allowed devices per window in Script Generator, and you will notice that many scripting form would open. To launch all script the same time, select Execute All from the context menu, and select the same output file for each script when prompted :
Potential Issues
The python script makes a lot of regex matching on command results to extract the information required. The regex patterns used was chosen with great care, however may not work correctly for some switch models it was not tested on.
Please test the script carefully on your devices before making any decisions based on the result, and if you experience animalities in output file, you will probably need to tune the underlying Python script.
The script operation is covered briefly in next chapter.
A glance under the hood
The detailed analysis and deep explanation of the script operation is beyond the scope of this article, but I would like to give a brief overview in case you need to modify it.
The vScript was written in Python and here is how it looks like in Visual Script Editor:
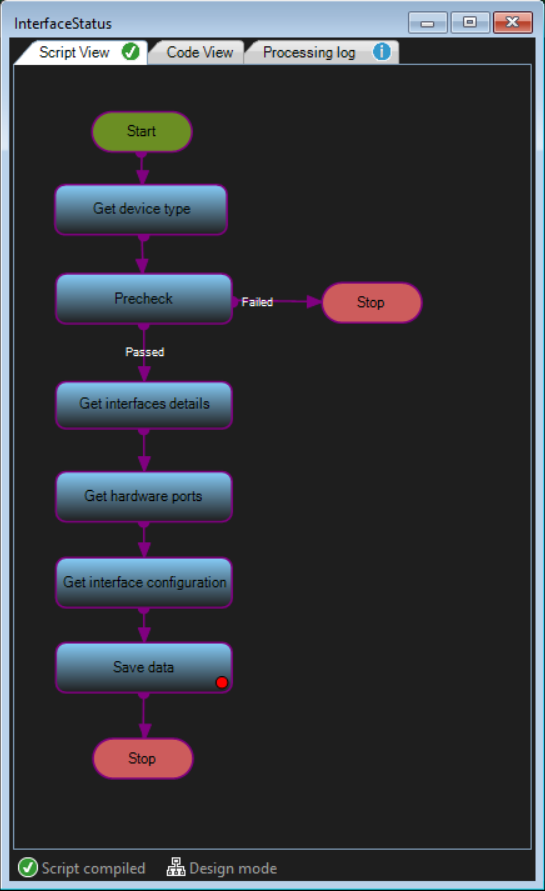
Each element in the script is a unique Python object having its own attributes and a single CLI command is specified for them. When executed, the element will send this CLI command to the connected device and the code associated to that element will parse the command result to collect the required information.
The script starts with asking the user to provide the output file name and location, then queries version information. The Precheck element will ensure a filename was provided and checks if the connected device is a Juniper EX / QFX switch. If these conditions are not met, the script is terminated returning an error message relevant to the issue.
There is a global Python list variable named Interfaces and it contains SwitchInterface objects. The SwitchInterface type is defined in global script properties to describe all the required attributes of an interface.
As execution reach to the “Get interface details” element, the show interfaces detail command is executed, and its result is parsed to build an initial list of Interfaces.
In the next step, the “Get hardware ports” element issues the show chassis hardware CLI command to the device, and its result is used by the associated code to update existing SwitcInterface attributes in the Interfaces lists, and also appends any unconfigured interfaces. Unconfigured interfaces are hardware ports on a PIC which has no configuration for some reason and therefore not listed by the show interfaces details command.
The last step before saving the output file is to collect interface configuration by parsing the result of the command show configuration interfaces | display set. This action is performed by the “Get interface configuration” script element.
At the end of the script, the “Save data” element will write the content of the Interfaces list to the specified output file.
Help
Should you have any quetions or run into difficulties feel free to contact me either on this forum or via the contact form on the website.